Immich is a self-hosted solution for photo and video management, without sacrificing your privacy. You can easily back up, organize ,search and browse your photos with this amazing tool.
installing Immich on our NAS is an easy endevour. Since we are going to install it as a container using Docker, please go back to my previous post and make sure you have Docker support available on your machine.
We are going to do this using a compose.yml file and a .env file as well
When working with Docker, especially in multi-container applications, two files often come into play: compose.yaml (or docker-compose.yml) and .env. Here’s what they are and how they work together:
compose.yml (or docker-compose.yml)This file is used by Docker Compose, a tool for defining and running multi-container Docker applications. It defines the services, networks, and volumes your application needs among other things.
.env FileThis file contains environment variables that can be used inside the compose.yaml file. Keeps sensitive or configurable values (like passwords, ports, or API keys) out of the main config and makes it easier to change settings without editing the .yml file
Immich install
Let’s go ahead and visit the Immich Quick-start website and download these files from there. I will input the command here as well:
You can SSH to your NAS and create a directory of your choice (e.g. ./immich-app) to hold the docker-compose.yml and .env files.
mkdir ./immich-app
cd ./immich-app
Get docker-compose.yml file
wget -O docker-compose.yml https://github.com/immich-app/immich/releases/latest/download/docker-compose.yml
Get .env file
wget -O .env https://github.com/immich-app/immich/releases/latest/download/example.env
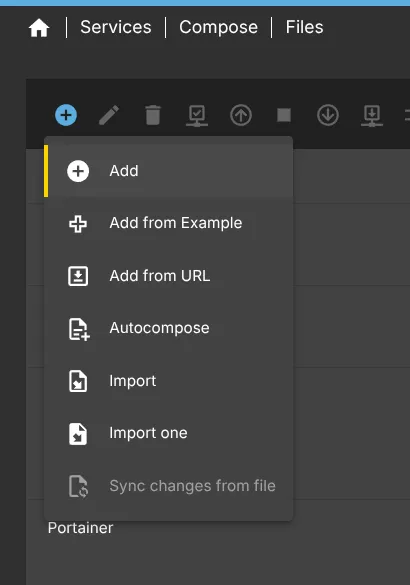
It is recommended to change the name of the .env file to Immich to keep enviroment files separate from our future containers. Login to OMV and go to Services -> Compose -> Files -> Add -> Add
In this screen over here, we are going to paste the contents of docker-compose.yml file in the first field, check Show environment file and paste the .env contents to the second field
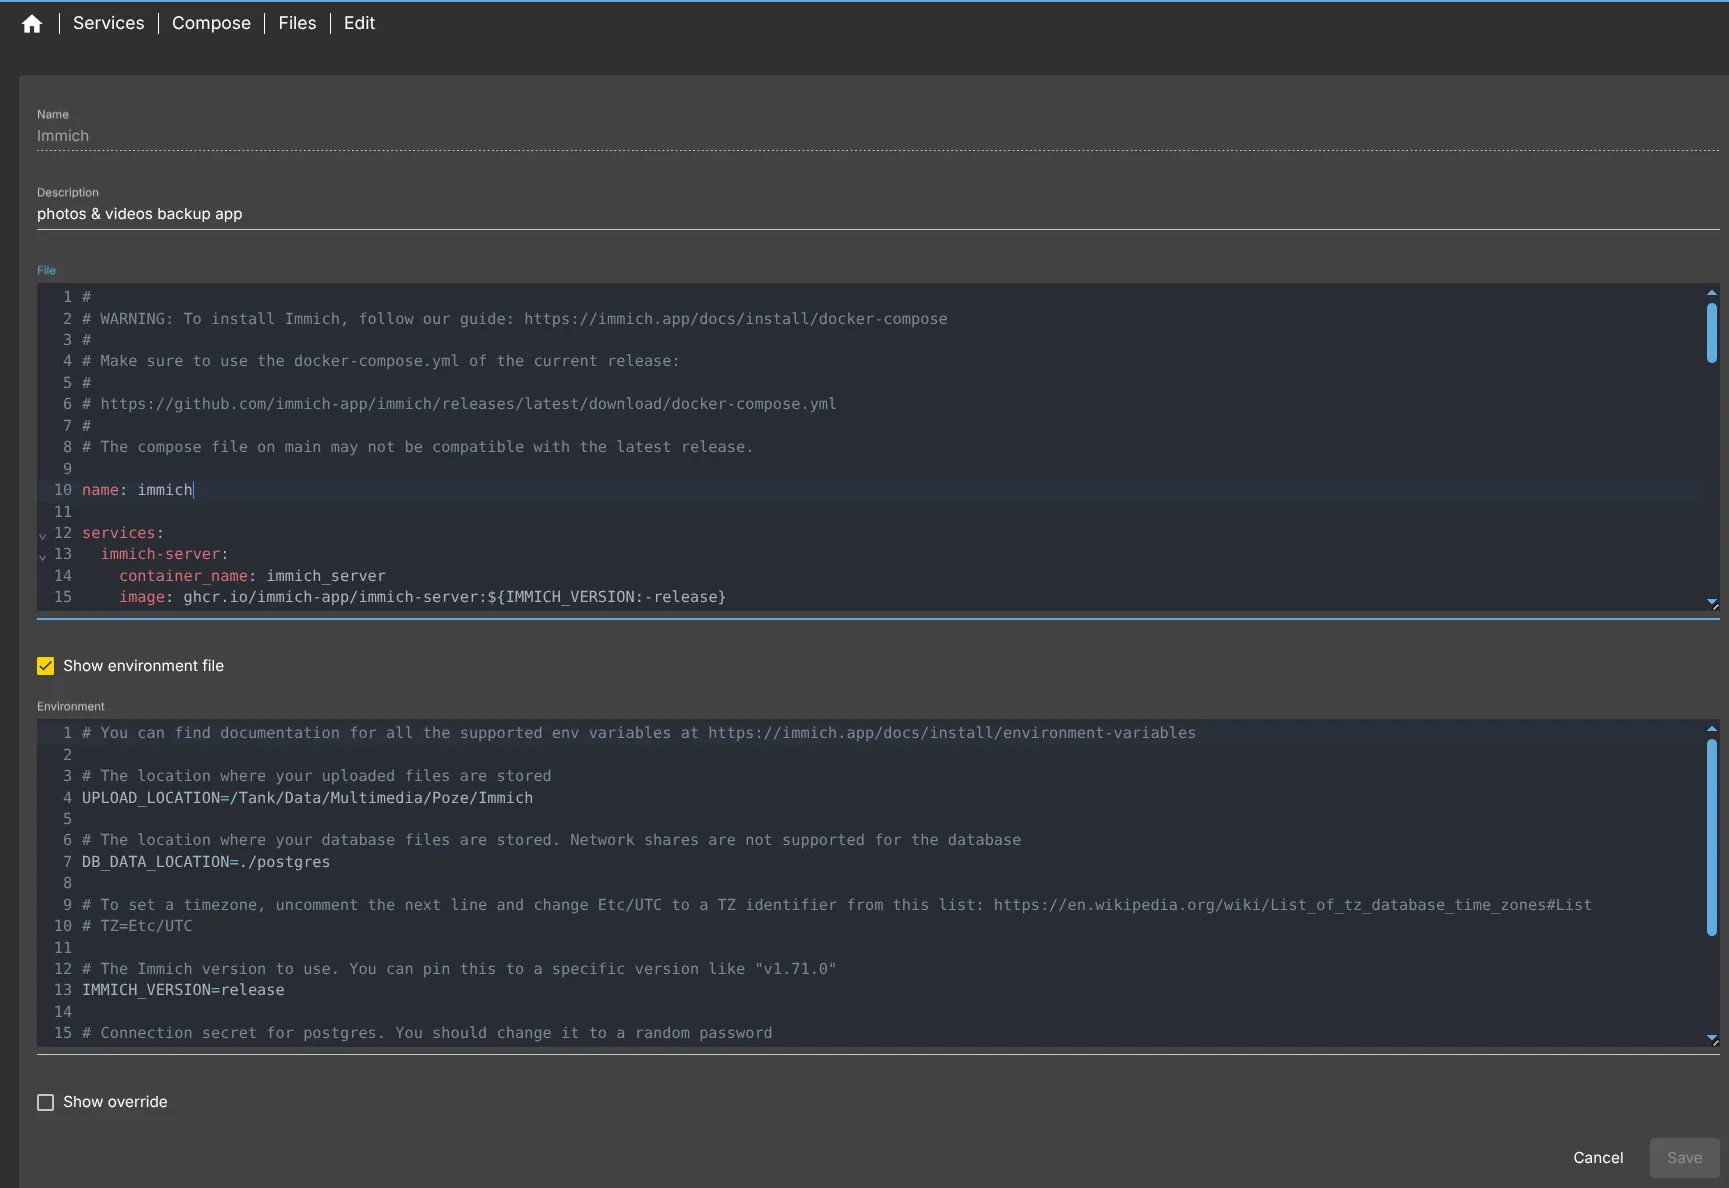
For the moment, let’s save this setup and we are going to come back since there are a few things of note here.
We are going to point Immich the location where to store the photos and videos we upload. Let’s go to Storage -> Shared folder and if you followed my previous post on how to setup ZFS, we will look for the Absolute path of the ZFS Pool and Dataset:

In our case, that would be /Tank/Data so copy this. Let’s go back to out Compose File, Services -> Compose -> Files, select the Immich file we saved before and hit Edit button

If you look up in the environment file we are going to see UPLOAD_LOCATION variable, which according to the description, is the location where the uploaded photos and videos are stored. In our case that would be the absolute path and we’ve created a Photos folder together with a folder dedicated to Immich. Other variables are not required to be changed. Something to note, is that you can change the DB_PASSWORD.
# The location where your uploaded files are stored
UPLOAD_LOCATION=/Tank/Data/Multimedia/Poze/Immich
If you take a look in the docker-compose.yml file, we can see in the volumes section of the immich-server service, the ${UPLOAD_LOCATION} variable defined in the .env file which we modified before. There’s also the env_file section which points to the, you guess it, the environment file. Remember we changed the name of this file when we downloaded it? That’s that exact file. Also, of note is the ports section. That is the port we are going to use to access the web application. If you don’t have another app conflicting with this port, you are not required to change it, but if you wish to change this, only change the part before the colon.
 volumes:
      # Do not edit the next line. If you want to change the media storage location on your system, edit the value of UPLOAD_LOCATION in the .env file
      - ${UPLOAD_LOCATION}:/usr/src/app/upload
      - /etc/localtime:/etc/localtime:ro
    env_file:
      - Immich.env
    ports:
      - '2283:2283'
If you look closer, please note that there is another reference of the env_file for the immich-machine-learning service, so please change the name there as well.
immich-machine-learning:
    container_name: immich_machine_learning
    # For hardware acceleration, add one of -[armnn, cuda, rocm, openvino, rknn] to the image tag.
    # Example tag: ${IMMICH_VERSION:-release}-cuda
    image: ghcr.io/immich-app/immich-machine-learning:${IMMICH_VERSION:-release}
    # extends: # uncomment this section for hardware acceleration - see https://immich.app/docs/features/ml-hardware-acceleration
    #   file: hwaccel.ml.yml
    #   service: cpu # set to one of [armnn, cuda, rocm, openvino, openvino-wsl, rknn] for accelerated inference - use the `-wsl` version for WSL2 where applicable
    volumes:
      - model-cache:/cache
    env_file:
      - Immich.env
Remember to Hit the save button in the bottom right corner of the screen.
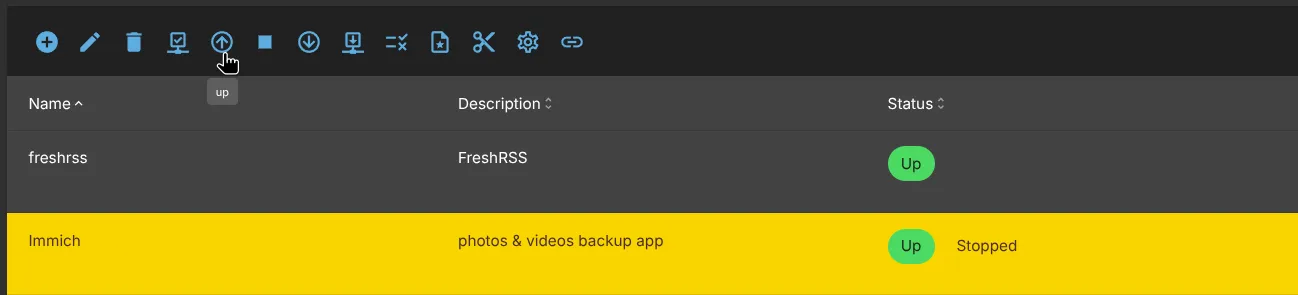
Now go ahead and select the Immich Compose file we just save and hit the Up button:
Open a new tab in your browser and in order to visit the web application input the IP address of your server followed by a colon and the port we mentioned earlier, 2283:
http://192.168.178.4:2283Pro tip: you can bookmark this address for ease of access in the future.
This will open up the registration screen for Immich, congrats:
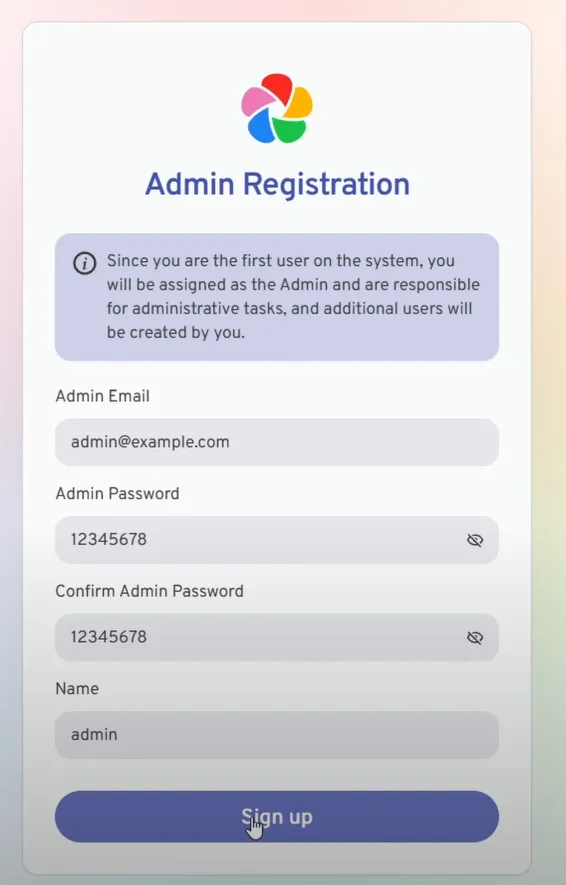
You can now go ahead and follow all the onboarding steps Immich is telling you for intial setup. If you wish, I can make a post with instructions on how to use Immich, but for the moment this is out of scope for this post. Here we learned how to install a docker container using a compose.yml file together with an .env file. I wish all your precious memories to be stored privately on your very own cloud at home. Thanks for reading!


